Installing street signs at intersections requires more than just mounting hardware to a post. Between municipal specifications, bracket compatibility, installation sequencing, and compliance requirements, there’s significant room for error—and those errors typically mean reinstallation at your expense.
This guide walks you through the complete process of how to install street signs at intersections, including two-way street signs installation and multiple street signs installation configurations, from selecting the right brackets to following proper installation sequences.
Whether you’re handling a standard residential intersection or a complex multi-street junction, you’ll understand exactly which mounting solutions to use and how to install them correctly.
Why Intersection Sign Installation Is Different
Street signs are almost exclusively installed at intersections. You rarely see standalone street identification signs mid-block, because their primary function is helping people navigate where roads meet.
This creates unique intersection sign mounting requirements where:
- Multiple signs must be mounted to a single post
- Signs need to point in different directions
- Visibility must be maintained from multiple approach angles
- Municipal specs are more stringent at intersections due to safety considerations
- Installation must account for traffic patterns and clearance requirements
Understanding these factors is essential when considering how to install street signs properly.
Choosing Between Mounting Options at Intersections
Intersection sign installation can be accomplished through three primary mounting methods, and your municipality typically specifies which approach to use:
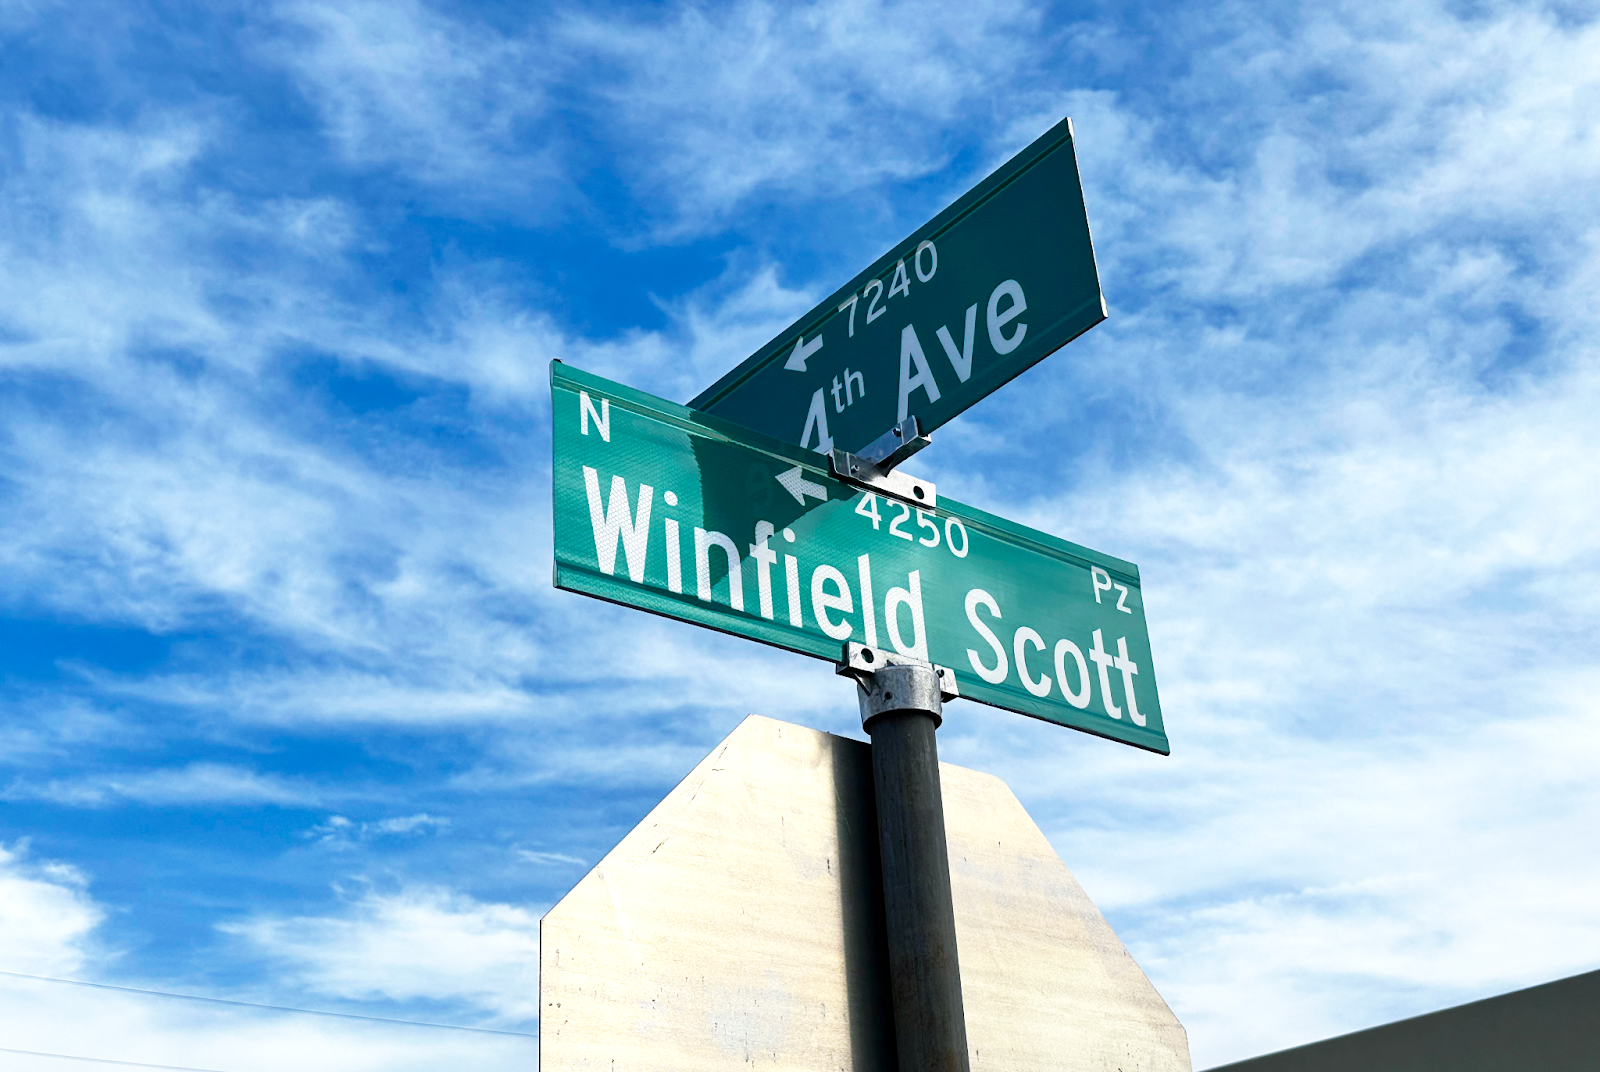
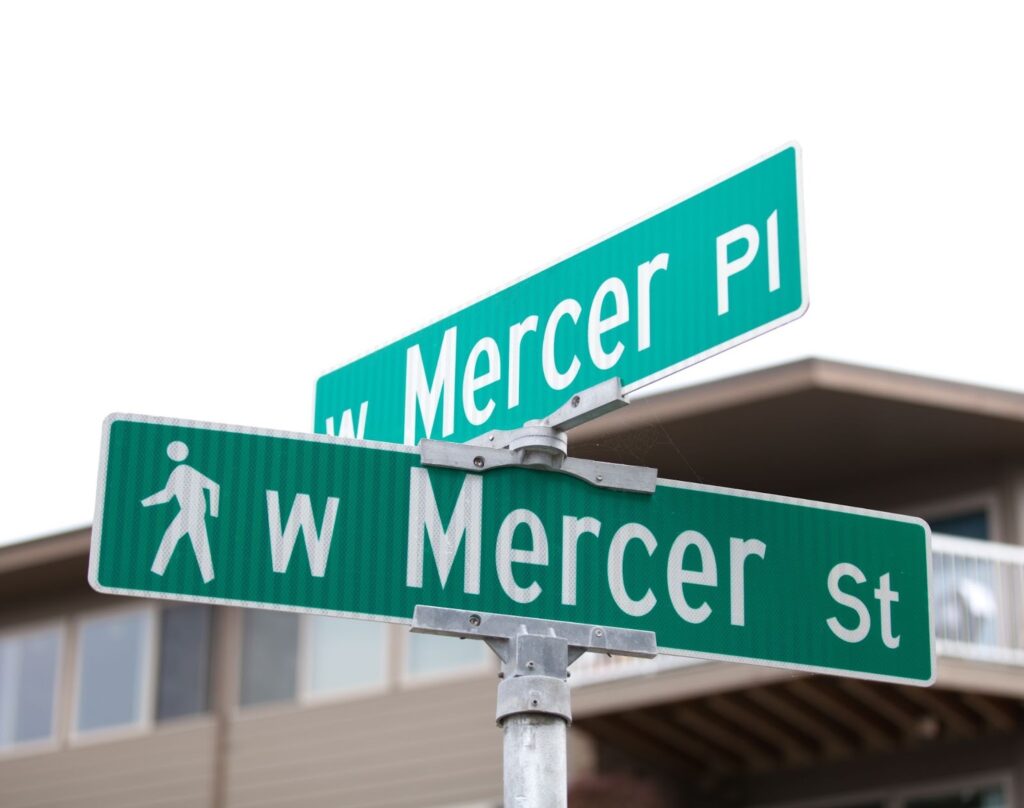
- Cross Pieces (Top Mount)
Cross pieces mount signs to other signs to display intersecting street name signs, creating a stacked configuration at the top of the post. This is the most common approach in suburban settings and less busy areas. Cross pieces are available in 5.5″, 12″, 18” and 24” sizes to match your sign dimensions.
Best for: Residential intersections, lower-traffic areas, standard post-top mounting.

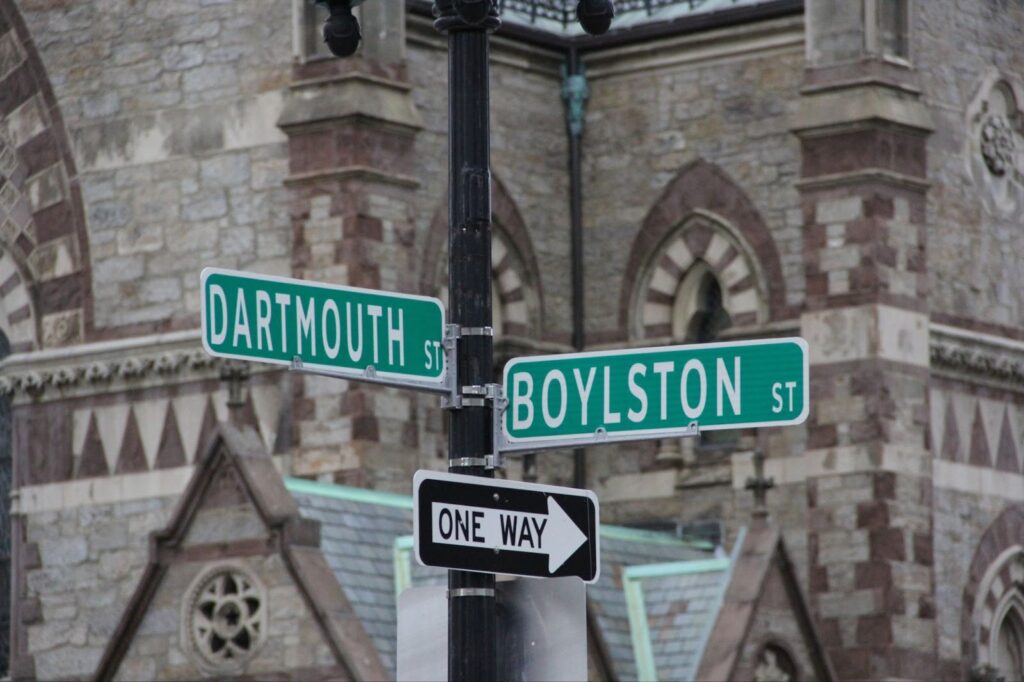
- Cantilever Brackets (Side Mount)
These brackets mount signs to the side of posts, positioning them perpendicular to the pole. Cantilever wing brackets place signs higher on utility poles for improved visibility in busy areas. Available in 16”, 24″, 30” and 36” sizes.
Best for: High-traffic intersections, urban environments, utility pole mounting.
- Overhead Mounting (Mast Arm/Span Wire)
In major urban settings, signs are often mounted overhead using mast arm brackets or span wire configurations. These provide maximum visibility in dense city environments.
Best for: Downtown intersections, major arterials, areas with heavy pedestrian traffic.
Critical note: Municipal specifications drive this decision. Top mount versus side mount is predetermined by local requirements, and deviation means a failed inspection.

Fixed vs. Adjustable Cross Pieces: When to Use Each
When your intersection sign mounting requirements call for cross pieces, you’ll need to determine whether fixed or adjustable brackets are appropriate.
Fixed Cross Pieces
Use fixed cross pieces when streets intersect at approximately 90 degrees—the standard perpendicular intersection. Fixed cross piece brackets are designed specifically for right-angle configurations and provide a clean, straightforward installation.
Example scenarios:
- Standard residential grid intersections
- Planned suburban developments with perpendicular streets
- Any intersection where roads meet at approximately 90 degrees

Adjustable Cross Pieces
Adjustable brackets are necessary in two situations:
- Non-90-Degree Intersections: When streets meet at angles other than perpendicular.
- Multi-Street Intersections: When more than two streets converge at a single point.
Example scenarios:
- Diagonal street intersections common in older city layouts
- Y-intersections or T-intersections at unusual angles
- Five-point or six-point intersections
- Historic districts with irregular street patterns
There’s no cost-benefit analysis to consider here–the intersection geometry dictates which product you need. If streets are perpendicular to each other, use fixed cross pieces. If they aren’t, or if multiple streets converge, use adjustable cross pieces. The situation determines the product.
Understanding Municipal Codes for Intersection Mounting
Every municipality establishes specifications for street sign installation that contractors must follow. While we can’t speak to specific municipal codes (they vary significantly by jurisdiction), understand that cities consider several factors when developing their signage requirements:
- Visibility Standards: Sight lines from multiple approach angles.
- Clearance Requirements: Minimum heights above roadways and sidewalks.
- Positioning Standards: Sign orientation relative to traffic flow.
- Bracket Specifications: Approved bracket types, sizes, and materials.
- Post Requirements: Post type, dimensions, and installation depth.
Your responsibility as a contractor is to obtain and follow the complete specifications for your jurisdiction before beginning any intersection sign installation. These specs determine everything: post type, sign size, bracket selection, and mounting method.
How to Install Street Signs at Intersections: Step-by-Step Process
Step 1: Install the Post Anchor (If Specified)
If your municipal specifications call for a post anchor, this is installed first.
Step 2: Install the Post
The post is set next, following your local specifications.
Step 3: Mount the Post Cap
Install the appropriate post cap—U-channel, round, or square—matching your post type.
Step 4: Attach the First Sign
Mount the initial street sign to the post cap.
Step 5: Install the Cross Piece
The cross piece bracket is installed over the first sign.
Step 6: Mount the Second Sign
The second sign (for the intersecting street) is mounted on top of the cross piece.
Important: Ensure you have the right installation tools for your specific brackets and hardware.
Making the Right Choice for Your Intersection Project
Successfully completing intersection sign installation requires methodical attention to these key areas:
- Follow Municipal Specifications: Your city or county has established requirements for post types, sign sizes, mounting methods, and bracket types. These aren’t suggestions—they’re requirements. Obtain complete specifications before ordering materials.
- Match Brackets to Intersection Geometry: The physical configuration of your intersection determines whether you need fixed or adjustable brackets. Let the geometry guide this decision, not cost or convenience.
- Account for Traffic and Environmental Conditions: High-traffic areas, high-speed zones, and locations with severe weather require brackets sized beyond the minimum. Factor in wind load, visibility requirements, and long-term performance.
When you understand how to install a street sign properly at intersections, the process becomes straightforward: follow specifications, verify compliance, match brackets to application, and install in the correct sequence. Skip any of these steps, and you’re likely to encounter problems.
Three Common Intersection Scenarios
Scenario 1: Residential Grid Intersection (90 Degrees, Medium Traffic)
Configuration: Two streets meeting at approximate right angles in a suburban neighborhood
Recommended solution:
- Fixed 90-degree cross piece (size determined by sign length)
- Top mount configuration
- Standard post cap matched to post type
Why this works: Residential areas typically use straightforward top-mount installations. The perpendicular intersection allows for fixed brackets, which provide reliable performance with minimal complexity. Sign sizes in residential areas are generally smaller, so 5.5″ or 12″ cross pieces are usually adequate.
Scenario 2: Urban Multi-Street Intersection (Non-90 Degrees, Heavy Traffic)
Configuration: Three or more streets converging at various angles in a city center
Recommended solution:
- Adjustable cross pieces to accommodate non-perpendicular angles
- Larger bracket sizes (12″, 18” or 24” cross pieces)
- Standard post cap matched to post type, OR
- Consider side-mount cantilever wing brackets for improved visibility (16″, 24″, 30” or 36”)
Why this works: Complex intersections require adjustability. Heavy traffic demands larger signs for visibility, which necessitates appropriately sized brackets. Urban environments often benefit from side-mount configurations that position signs higher on utility poles, improving sight lines in visually cluttered areas.
Scenario 3: High-Speed Intersection (90 Degrees, High Traffic Volume)
Configuration: Major roads intersecting in areas with speed limits above 35 mph
Recommended solution:
- Larger signs requiring larger brackets (18″ cross pieces minimum)
- Robust bracket construction to handle wind stress
- Standard post cap matched to post type, OR
- Consideration of cantilever side-mount brackets for enhanced visibility
Why this works: High-speed areas demand larger signage for driver reaction time and visibility at distance. Larger signs create greater wind load, especially in exposed locations, requiring brackets sized to handle environmental stress. The bracket selection accounts for both sign dimensions and performance requirements.
Get Expert Guidance on Your Intersection Sign Project
Not sure which brackets fit your specific application? Contact MDSolutions. Our team can help you verify you’re selecting the right brackets and confirm proper sizing so you can install your intersection street signs right the first time, whether you’re doing two-way street signs installation or multiple street signs installation.